October 12, 2011

Cotton Reels!

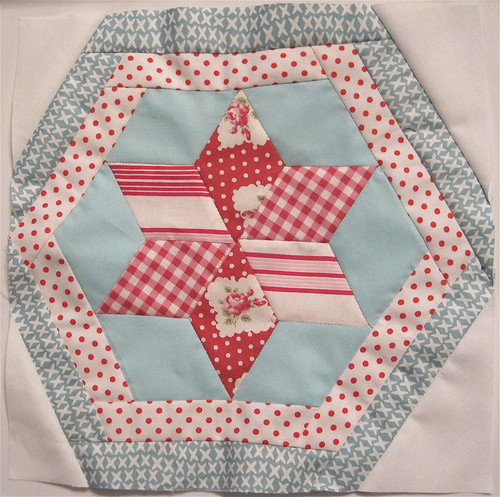
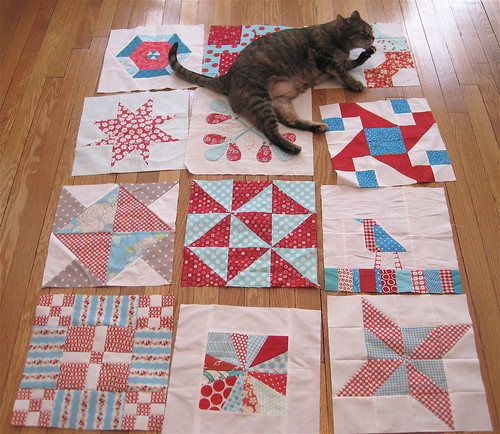
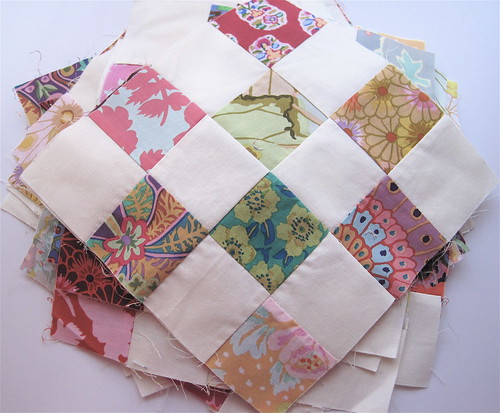
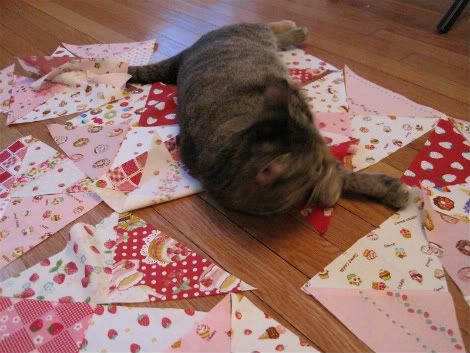
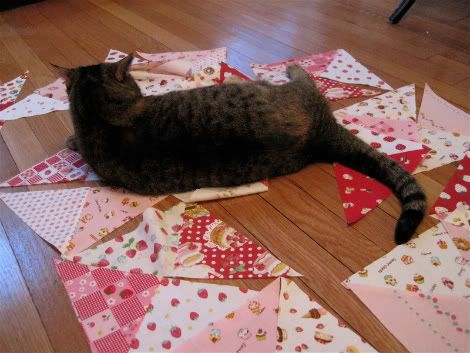
I'm finally getting around to posting the blocks I made for the 3x6 virtual quilting bee.

3x6 blocks

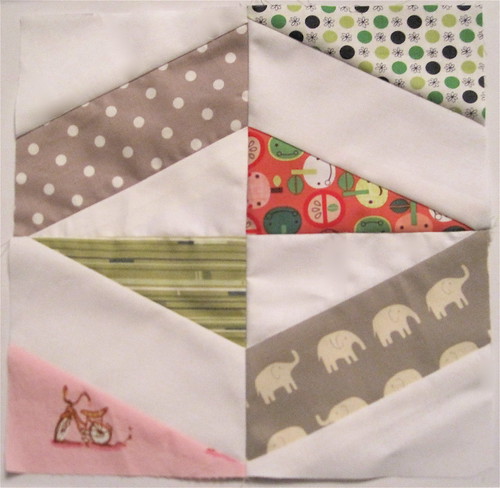
I chose a pattern called "cotton reels," because I really enjoy cornily symbolic block names. A pattern for an 8" block (I added a 1" and 2" border to make a 12" square) can be found here, naturally.

And... that's it for me for the 3x6 bee, at least for a while. With the holidays coming up, and the 4x5 bee starting again, I knew I needed to lighten my commitment load. I've been a part of 3x6 for 4 quarters - that's a whole year! - and by the end, will have 24 beautiful quilt blocks. Enough for a twin-sized quilt.

Here's the thing I always forget about these virtual bees: it's practically no thing at all to carve out time to make a block a month, or 5/6 blocks a quarter, or what have you. If you're going to be sewing anyway, you can pull this off. But at the end? When you are literally ankle deep in the handmade awesomeness you've received from your fellow swappers? It's like, "How will I ever find time to turn these blocks into a quilt???"

Hence my egress from what has been a really phenomenally fun and rewarding group. Starting projects is great, but finishing them is - well, I hardly remember what that feels like.

Is there a virtual bee for finishing projects? Now THAT would be amazing!

October 6, 2011

October


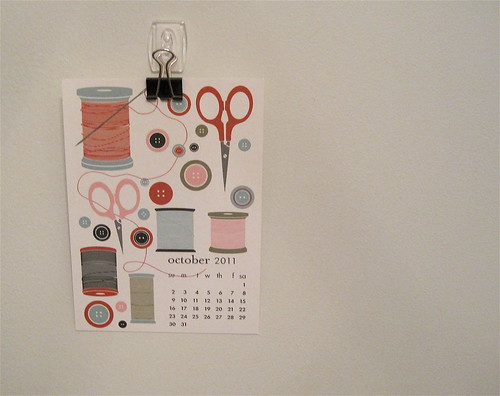
I just want to post a big "Thank You" to Paper Source for knowing, in advance, how I'd be spending my October.

September 9, 2011

The Grind. (Or is it?)

Sometimes I don't blog for a while because it can get a little "same-old" up in here. Keeping up with posting here requires SO much planning on my part. I think it's because my crafty life is structured around trying to make money, and that requires a certain unexciting, assembly-line schedule.


(Newsflash: I make these. I make these, like, every day.)

Part of me envies the bloggers who aren't running businesses. They seem to have more room to change things up, creatively.

That said, after almost seven(!) years, I'm not sick of making masks. I find it almost physically satisfying, in a way. And getting to sell a really high quality product feels like an enormous privilege.

Sometimes I just want more hours in the day to stretch my wings and take on new projects. (Preferably without any wrist or shoulder pain.)

September 2, 2011

Recipe Roundup: Tacos and Ice Cream

Since this isn't a cooking blog, and I'm more of a recipe follower than a recipe developer, I don't post a lot about food.

That said, I've been tinkering with some new recipes, as well as pretty confident in a slow-cooked faux-dobo recipe I came up with a few months ago, and I wanted to share the results. The theme this time is tacos and ice cream - and no, I'm not pregnant. These are things I've tried over the course of a couple weeks, so I'm not necessarily endorsing the combination, just the individual recipes.

First, the main course: Crock Pot Pork "Adobo". I came up with this when looking for a use for leftover brine (which includes chopped onions and red bell peppers) from cilantro freezer pickles. I got my recipe from The Joy of Pickling, but there are a bunch of versions on the internet you can try. In fact, if you only get as far of the pickles, you'll be happily munching for months to come, but the pork is a wonderfully low-effort way to get a fatty, flavorful taco filling. It can also work plain with beans and rice, in burritos, enchiladas, etc. Which is good, because unless you have a giant family, or lots of guests, there will be leftovers. I recommend using an amount of pork that will suit your needs, wants, and/or crock pot size.

Crock Pot Pork "Adobo"

1-2 c. brine from cilantro freezer pickles
1 14-oz. can coconut milk
1/4 c. soy sauce
dash of chili flakes (optional)
2-6 lbs. pork ribs or pork butt

Pour all ingredients except pork into crock pot. Stir to combine. Add pork, fatty side up. Cook on preferred setting, for at least 4 hours. Shred meat and reserve juices if desired. I made some rice, substituting half of the water with pork broth, and it was really delicious. Serves a lot.

Now, for the sweet stuff. I recently decided I couldn't live without a KitchenAid ice cream maker attachment for my stand mixer, and ever since it arrived, I've been obsessed with recipes for delicious, unusual recipes for frozen treats.

First up was David Lebovitz's Quick Coconut Ice Cream with Saffron, because, well, he had me at "quick" and "saffron." This was a great way for a beginner to get started, as it's indeed quick and pretty darn foolproof. I recorded some of my impressions here.

I wanted to make the saffron coconut ice cream a second time, but it wasn't meant to be - both I and the grocery store were out of saffron. Luckily, my sister-in-law had mentioned having some delicious vanilla ice cream with honey and curry powder at the Big Gay Ice Cream truck, so I was inspired. Using the same coconut milk base (times three because I wanted more ice cream this time), I added a teaspoon and a half of vanilla extract, two teaspoons of curry powder + an extra dash of ground cinnamon and ground cardamom, and replaced 1/3 of the sugar with honey. I don't know how it compares to the Big Gay version, since I don't make it to NYC often, but it was creamy, spicy, and flavorful - a nice change from super-sweet commercial vanillas.

Finally, froyo. I didn't buy my churner with the intention of making a bunch of froyo, but I read somewhere it was SUPER easy, and I'd much rather toss a container of yogurt with some sugar and flavoring than separate a bunch of eggs for the fancy custard recipes that came with the maker. Fortunately for me, the former is exactly what you get to do when making this recipe from 101 Cookbooks. I scaled the whole thing up by 1/4, since I used a four-cup container of Greek yogurt. Most ice cream recipes need a few hours of post-churning freezer time, but here, the thick yogurt means this is ready to eat right out of the churner and potentially save yourself some time. I was concerned this would mean too-solid yogurt later on, but the texture was still perfect several hours later. Yogurt = superfood.

Indeed.

August 31, 2011

Getting ready?

If the blogosphere is to be believed, crafters love autumn and can't wait for it. Well, they can have it. Those of us living in cities where the annual snowfall can be measured in Shaqs aren't quite ready to let go of summer.

Hence, the springy palate of this week's projects, so far:


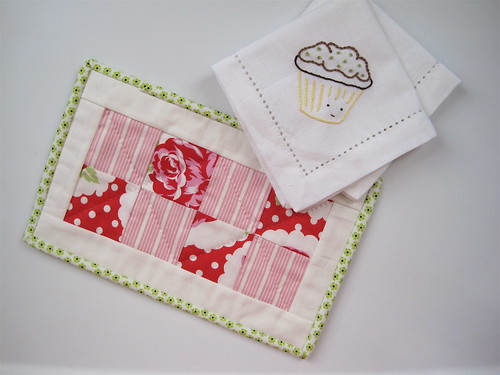
Ironically, these are holiday gifts - at least, in theory. The "loaf trivet," which was inspired by the mug rug craze, turns out to be just the right size to protect a countertop from a hot pan of bread, is for me. But it's made so quickly and easily from two charm squares, a 1.5" border, and a bit of binding, that, if your short on gift ideas this year, I recommend stitching up, like, a million of these. You could do it today. I hand-quilted it, because I like that look, in about 15 minutes, but stippling would look amazing, too. I like the idea of making these in reds and greens, or even, say, Halloween prints, and giving them away with homemade loaves of bread, or even empty loaf pans & bread mix. (Why bake when you could NOT bake, right?)

The napkins are in cutesy pastel colors, because they're cupcakes, and that's how I roll. If you live under a rock, you might not have seen these free patterns, which I stitched on some napkins I got during a recent Sublime Stitching sale. I'd show them all off, but they're a gift, and should the recipient stumble upon this photo, I don't want to spoil the whole set.

So am I ready for fall? Depends, I guess. Am I psyched for cider and falling leaves? Not particularly. Am I working at injecting a bit of spring into the colder months? Indeed.

August 27, 2011

Let's roll.

If there is such thing as a good roll of fat, I have found it.

rolls

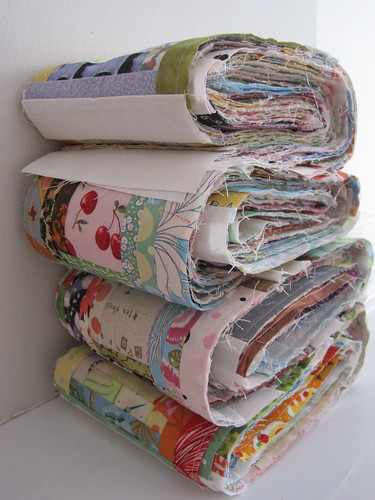
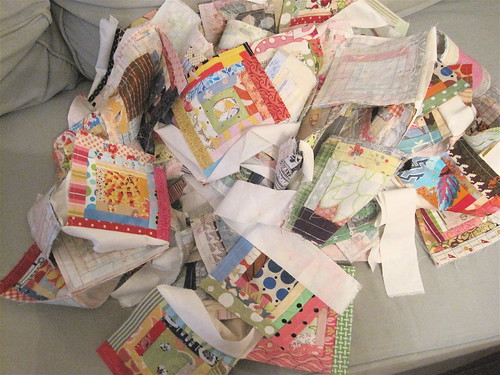
144 partially sashed log cabin blocks, sewn into 1x4 strips. Soon to become a total of 9 4x4 grids. Putting the top together will be like piecing a giant 9-patch.

I'm not sure I've ever been so excited about math.

August 24, 2011

M-T-W


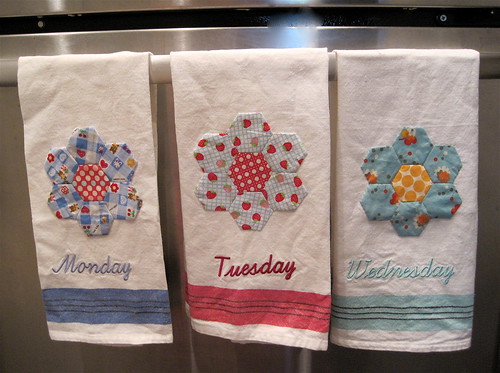
Is this the housewife's equivalent of dressing for the job you want? My initial goal was to press one of these and hang it each day, but they're cuter as a trio, I think.

I wish the photo light in the kitchen weren't so fug. It's really the cutest room in the whole apartment, when it's clean.

And while I'm griping, why did Martha ever stop making days of the week tea towels? I would embellish a set for everyone I know, if I could.

Hear that, Martha?

August 22, 2011

4x5! 4x5!

4x5 blocks

I'm so excited to finally be finished with my blocks for the 4x5 quilting bee! They were a challenge, but I REALLY enjoyed them.

In fact, I may or may not be planning a cute unisex baby quilt made up of nine of these stars. Because, you know, what's another unfinished project or two [dozen]?

August 4, 2011

3x6 Blocks So Far

It's August now, which means summer will be over soon (NOOOOOOOOOO!) and that the 3x6 quilting bee is starting up again (YESSSSSSSSSSS!)

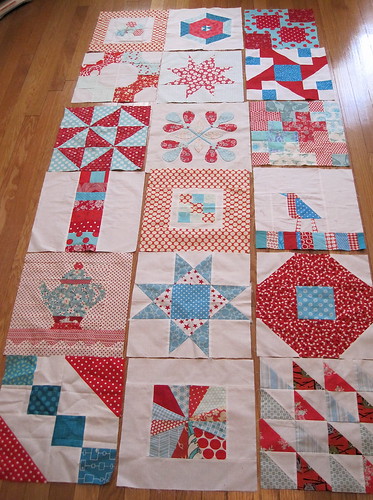
I lined up my blocks received so far, so that everyone can match accordingly.

3x6 blocks received so far

And I'm glad I did, because nothing is getting me ramped up for another round like seeing these all together! I barely spent any time on the layout; they are just so varied and so lovely.

So, sometime in October, I should have six more of these, enough for a twin-sized quilt.

It's almost enough to get me excited for fall!

July 31, 2011

Cabins on the couch


And so begins the sashing.

So... much... SASHING.

Does it make sense to say that I love and hate this process?

July 25, 2011

Templated!

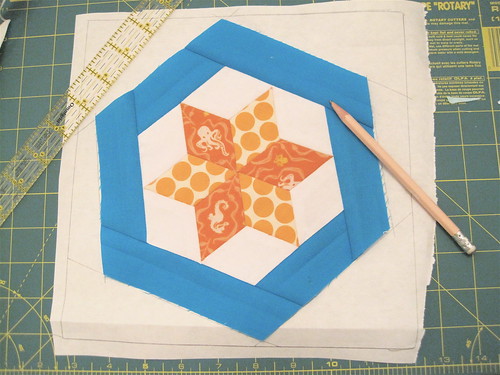
Not too long ago, I was trying to decide whether or not to make myself templates for the bee blocks I've been developing. I waffled instead of working - quelle suprise - for a few days, and, suddenly, one night, I wondered, "How long would it take to make templates for these blocks?"

Curiosity is a strange motivator, because about 5 minutes later, I'd used one of my bordered hexagons as a guide for drafting some pattern pieces on freezer paper.


It was all very high tech, as you can see.


Freezer paper templates are nice, because you can just iron them to the right side of the fabric and use a ruler to add a seam allowance before cutting.

(At least, that's the only way I can make them work!)

Here is the finished block:


SO much easier with templates.

I should have blogged this sooner, but the heat wave basically fried my brain, making me forget I'd made any progress. It also kept me out of the hot, hot sewing room, so this week I'll need to buckle down and make some real progress on these bee blocks, since 3x6 starts on August 1st!

July 18, 2011

Gone hexin'...

back in three days.


Okay, maybe not, but I've really enjoyed hiding out from this officially Too Darn Hot weather making hexagon stars for the 4x5 bee. They're hand-stitched, which takes forever, but they don't feel like they take forever, which is basically ideal when it comes to a summer project. Lots of hours with an audiobook or The Tudors, no boredom to force me out into the heat.

If only I could eat some of my fabric stash instead of shopping or cooking - this could be the best, hexiest summer ever.

July 15, 2011

Non-disaster strikes!


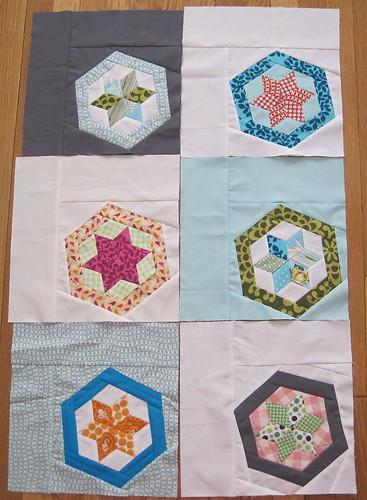
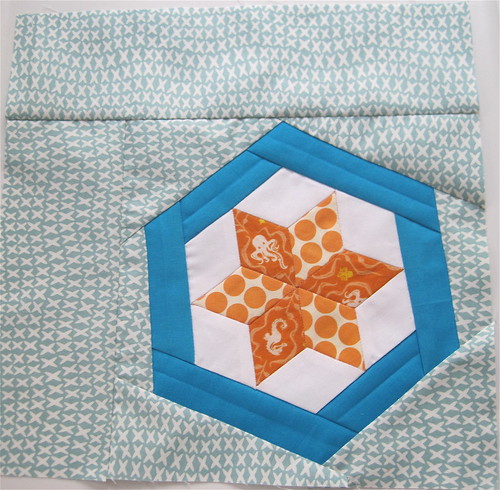
Well, my hexy star block hasn't been perfected just yet, but I have achieved a 12.5", non-wobbly, non-disaster. I used smaller diamonds, to start with, and that put me on the right track for creating the "offset" look I'd envisioned - it's really hard to offset something that takes up most of the block.

Consulting the tutorial over at Sew Lux was definitely helpful - our hexes weren't the same size, so I had to augment with some extra triangles, but it was definitely a start. Her suggestion to add border strips on opposite sides of the hex turned out to be particularly effective in not stretching out all of my careful hand-piecing.

Now I'm wrestling with whether or not I should continue to wing it when piecing the outer borders, or just be responsible and make some freezer paper templates.

Decisions, decisions.

July 13, 2011

Bee Blocks: Trial Runs

I decided to try out a couple of blocks for upcoming bees: the famous [3x6] bee, and its new sister bee, 4x5.

I'm glad I did, because there were, well, issues.


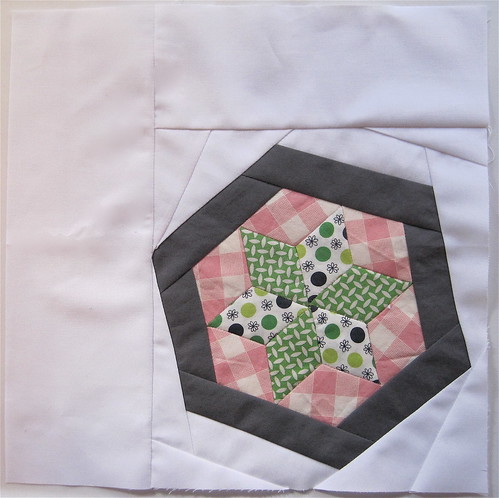
That's the star block I made, and... I don't even know what to say about it. I'd pictured it differently in my head, and so of course it's my own fault for not following my vision more carefully. Needless to say, I've started this one over.


The Left and Right block, which you may know from Quilter's Cache, may look promising, but it was a little fiddly. The main problem was that I make paper piecing templates out of tracing paper, which comes in 9" x 12" sheets. For each quarter, I used a 6" square of tracing paper, cutting two from each sheet in an attempt not to be wasteful. But to get a the 12.5" square block that's the requisite size for bees, I really needed 6.5" quarter blocks, and adding a .25" seam allowance to all sides is actually pretty tricky when angles are involved.

But since I'm happy with the way it came together, I think I'll use it for the next round of the [3x6] bee. Only I'll go easy on myself, reducing each quarter template to 4.5" and adding a bit of a border. Stay tuned for another trial block.

In the meantime, even though these aren't so perfect, they are giving me a head start on some sampler quilts!

June 24, 2011

Teacup Tutorial

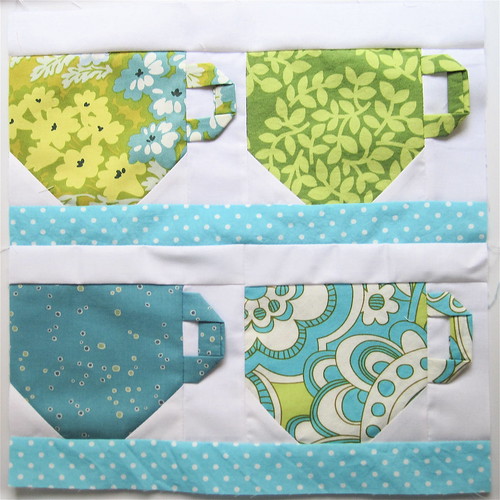
Once again for the [3x6] Sampler Quilt Mini Bee, I decided to modify some ideas into a block of my own design.

The advantage here is that I don't have to worry about making the same blocks as anyone else. The disadvantage is that, when someone compliments the block, I can't just toss them a link to some tutorial. Until I write said tutorial myself, that is.

So here's an attempt to help you make your own 12" teacup block.


A couple of notes:
  • I didn't take pictures of every single step. So sorry! Rest assured, this is a simple block.
  • Some tea cups will "change color" throughout the post. This is the unfortunate result of me being a tad late with my blocks this round, and having to snap pics during a furious assembly line process.
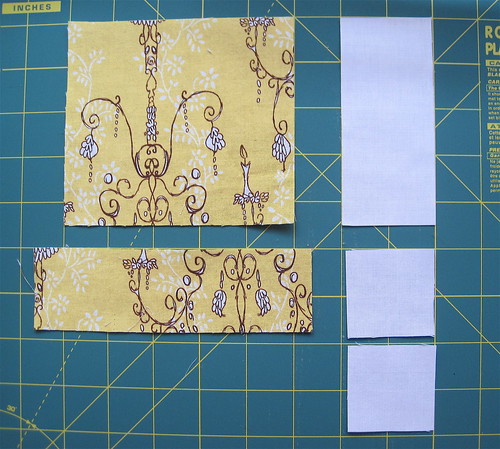


For your tea cup and handle, you'll need:
  • 1 print rectangle, 4.5" x 5"
  • 1 print rectangle, between 1.25" and 2" wide, at least 4" long
  • 1 white (or background) rectangle, 2" x 4.5"
  • 2 white (or background) squares, 1 7/8"
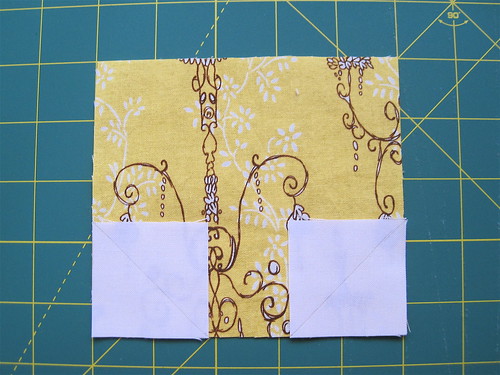


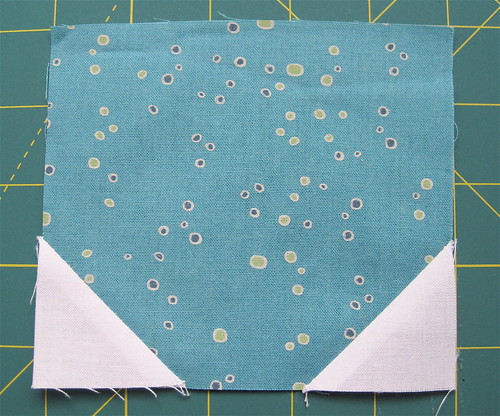
Use a pencil or water-soluble pen, draw a line from corner to corner across each 1 7/8" square. Place the squares on the bottom corners of the 1 print rectangle, 4.5" x 5", as shown, making sure edges are aligned. Pin if desired. Sew carefully along the pencil lines.


Using a ruler, trim off both corners .25" from the seams. Fold down the white fabric and press. You have just created the curved bottom of a tea cup! See?


Take the remaining print rectangle and fold it longways with the right sides together. Sew .25" from the raw edge to make a tube:
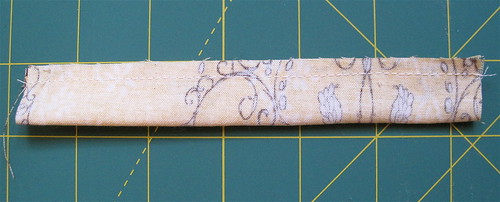


I like to make the tubes varying widths.
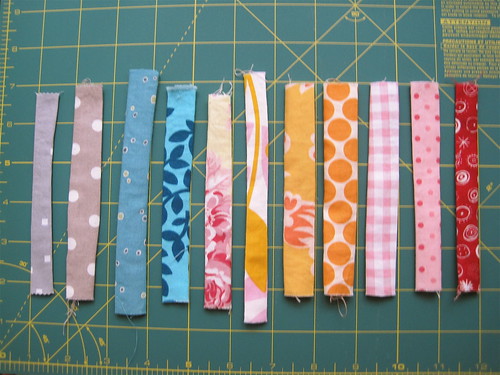


Mostly because it's easier that way. Use a turning tool to turn the handle so the right sides are facing out, and press to get nice, crisp edges.

To attach the handle to the rest of the cup, line up the 2" x 4.5" rectangle to the right of the pieced cup unit.
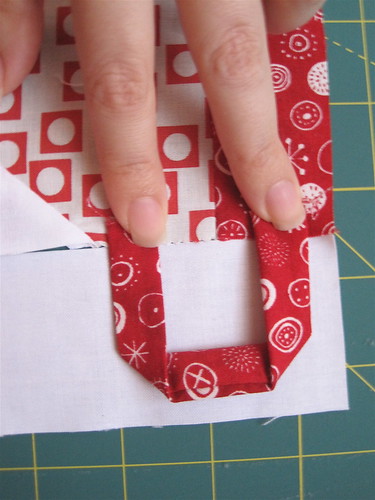


Fold the handle piece into a "u" shape until it resembles a cup handle of your liking. Pardon my (lack of) manicure.
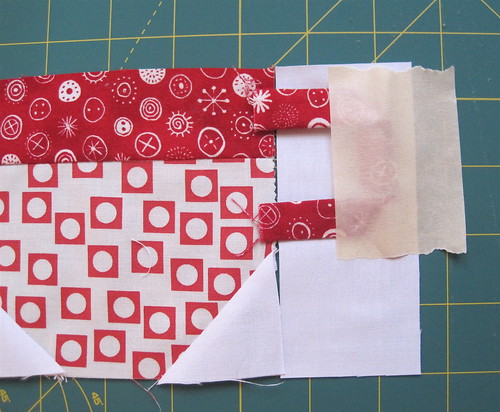


Pinning would be fiddly at this point, so I just stick the handle to the background rectangle with a bit of masking tape. As long as you keep the tape out of the seam allowance, it won't interfere with sewing.

You can see how I kept excess handle fabric to the left of the background rectangle, where it will get caught in the seam and can be trimmed later.

Sew, trim, and press, and TA-DA!
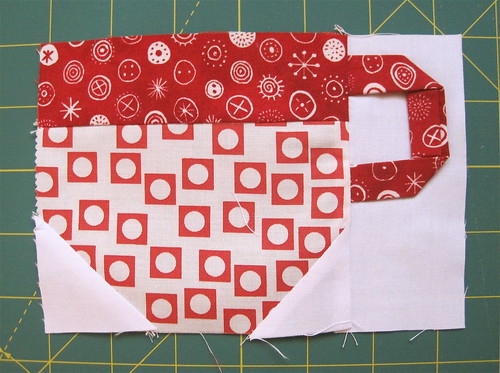


To turn four 4" x 6" teacup units into a 12"-block, arrange them into two rows and attach them like so:
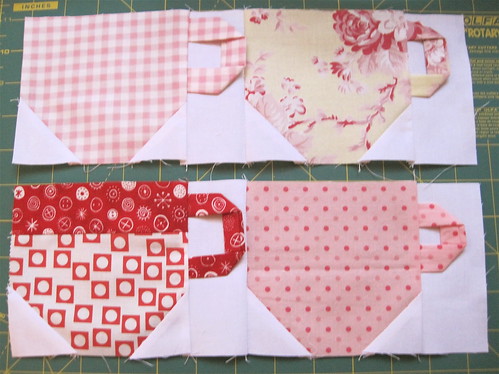


To EACH of these units, sew one white (or chosen background fabric) strip of fabric 1.5" x 12.5" to the top of the unit, and a strip of the same size in your chosen shelf fabric to the bottom of the unit.

Then, stack the units and sew them so they look like this:


Of course, you can make a 6"-block by adding 1.5" x 6.5" strips to the top and bottom of one cup unit, but I was aiming for a 12"-block, and the appearance that the cups were together in a cabinet or on shelves together.

Handles can be appliqued down, tacked down, quilted down, or left to flap freely in the wind!

Please leave a comment with any questions or concerns!
June 21, 2011

Busy Bee

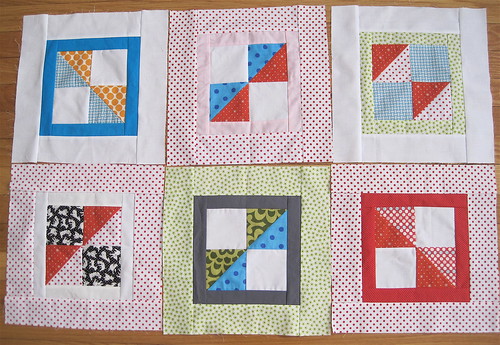
Okay, the truth is, I haven't posted because I was on vacation. And then I got back, and I had to get busy. See?


Tutorial coming soon!

May 20, 2011

A dreadful miscalculation.

Or not. I'm still deciding.

The good news is that my squirrel embroidery is finished! Or, at least, I've completed the pattern.


As you can probably see, this was supposed to be a round design, but it's a little, um, oblong. That's because the fibers in the linen I used weren't totally even - it was a home dec fabric, not one designed for stitching.

Live and learn.

So the design is an inch wider than it is high. Which isn't bugging me too much, except I'm not sure how I want to finish or frame it. I had originally envisioned it in a hoop, but I'm not sure I can find one in the correct shape. Should I add a border? Make a tiny pillow?

One of the toughest things about stitchery is finishing. I definitely understand the appeal of tea towels today - pre-cut, pre-trimmed, and you can never have too many!

May 5, 2011

An hour a day


A couple of years ago, I bought some awfully cute patterns from superbuzzy, but didn't start on them, or even plan to start on them, right away. I have a tendency to burn out on projects, and I didn't want to start on something without a clear plan for the end game.

Recently, I got some stitchable linen for a good price, and I've been itching to embroider basically everything I see. So it seemed like time to get started on my cute patterns.

My technique? I can only work on it for an hour a day. Preferably while listening to This American Life. Does that seem counter intuitive? Maybe to crafters who don't binge, and then burn out on, projects.

Every time I put this down, I feel sad. I can't wait to pick it up again. So progress, if not speedy, is steady. Can I stay interested until the end?

Let's find out.

April 29, 2011

Martha, Martha, Martha!

Hey, check out this passage from Chapter 28 of Little Women:

Like most other young matrons, Meg began her married life
with the determination to be a model housekeeper. John should
find home a paradise, he should always see a smiling face,
should fare sumptuously every day, and never know the loss of
a button. She brought so much love, energy, and cheerfulness
to the work that she could not but succeed, in spite of some
obstacles. Her paradise was not a tranquil one, for the little
woman fussed, was over-anxious to please, and bustled about like
a true Martha, cumbered with many cares.


Okay, thank goodness Penguin was good enough to include a footnote reminding me of the Biblical story of Mary and Martha, because as I read this last night, my first thought was "WHAT? Martha Stewart is so powerful she could go way the eff BACK IN TIME and make Meg March Brooke feel inferior about her domestic abilities?"

We already, for reasons that still elude me, have Pride and Prejudice and Zombies. Why not Meg March Meets Martha Stewart Living Omnimedia?

April 27, 2011

Tea Towel Time

I'm trying to work throughout the year to get some holiday gifts made. I always have huge ambitions for Christmas gifts, since the hunting/gathering/making is my favorite part of the year-end festivities. But these ambitions get thwarted by the realities of trying to run a business during holiday times.

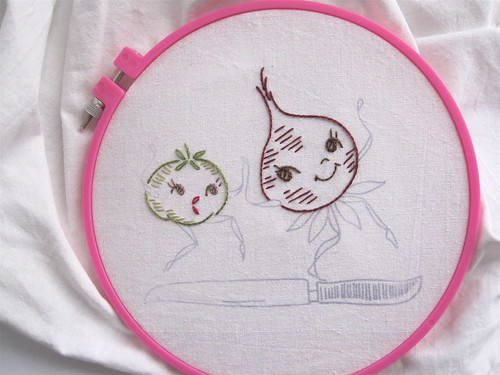
One of the things I never seem to have enough time for is embroidery, because it's tough to correctly set aside the hours to finish all the ambitious, detailed projects I dream up. So I decided to start a tea towel and measure the time it took to stitch up in units of good books and a combination of both quality and crap tv.


Photo 1 shows phase one of stitching, which I completed while listening to a chapter and a half of Edith Wharton via librivox, and while watching an episode of Treme. I would have loved to take a pic during the break between listing and watching, but it was nighttime, and this really does represent a continuous stitching session - bodies and faces.


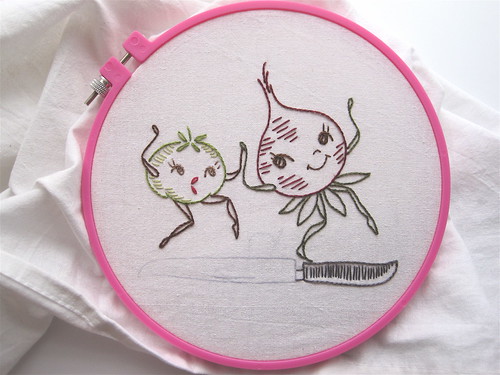
Here's what I managed the following day while watching the William and Kate Lifetime movie: beet greens, arms, and legs, plus another arm and a femur/shin combo. This was a useful exercise, because these are the little details that I never think will take very long, but, in these case, they took a two-hour tv movie, minus commercials.


Since I was on a little bit of a roll, I finished up the tomatillo limbs and the knife handle while checking in with the Real Housewives.


This required a bit of brain cell replacement therapy, so I revisited Ms. Wharton while finishing the knife blade.

So there you have it - a gift finished in under five hours.

Now, to decide on the recipient.

April 21, 2011

Greetings from the couch.

Remember my cold from last week? It's still here. It's kindly gone through sever phases at this point, so I'm confident that, I'll, you know, live. But the crankypants? I have donned them.

I've been getting into Little Women though, and I am OBSESSED. One thing I had forgotten about was the fact that the Marches are, like, champion DIY-ers. Yes, yes, everyone was then, but not everyone WROTE about it. So I keep getting distracted from the prose while I fantasize about recreating important March artifacts. (Martifacts?) Embroidered handkerchiefs. Slippers for old Mr. Laurence. Pickled limes - omg, pickled limes! Confession time: all pickles haunt me with their deliciousness, but most varieties don't have such an august position in the literary canon as Amy's limes. I mean, the Pickled Lime Incident of 18__ caused Marmee to let Amy drop out of elementary school. CRAZY.
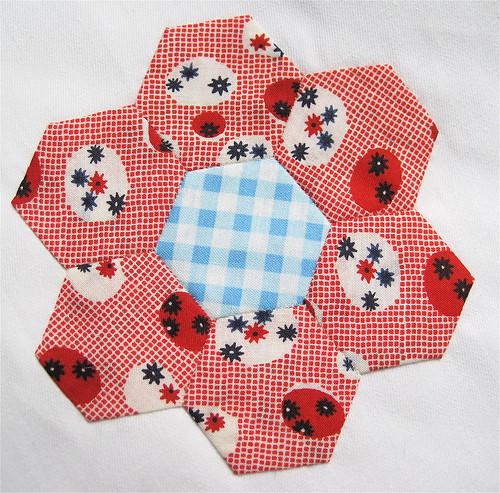
Sadly, I have not yet procured proper pickling limes - I've barely made it out of the apartment - so I've had to be content with plugging away at a project already in progress - my hex flowers.


At least I get to update my status box!
Quilt: Hex Flowers
Progress: 48/100 blocks (48%)

April 15, 2011

Jo Meets Apollyon

You know those days when your body just won't cooperate? Ever have a few in a row? Then suddenly feel better only to wake up with yet another, totally unrelated ailment?

I've had the sort of week that wants to knock me down as soon as I get up. Nothing major, but I'm about ready to admit defeat and curl up with some serious comfort reading. Which, sadly, is not something I can get from my current unread book, A Game of Thrones. And more's the pity, because it is, as promised, fabulous.


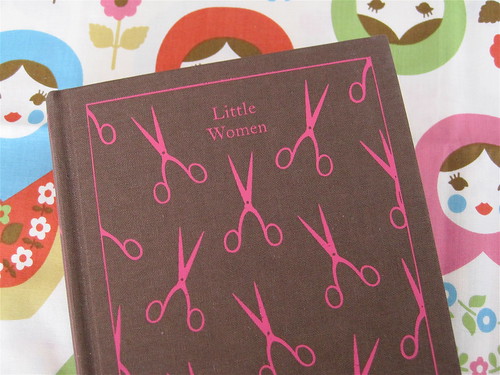
No, ever since the ladies at Forever Young Adult began their Little Women read-along, I've been itching to catch up with the March family. Which, as someone pointed out, would have probably been pronounced "Maahch" by the family in question. So it's a good thing I impulse-purchased this gorgeous Penguin hardcover (of a public domain book I can get for free online) a few months ago.

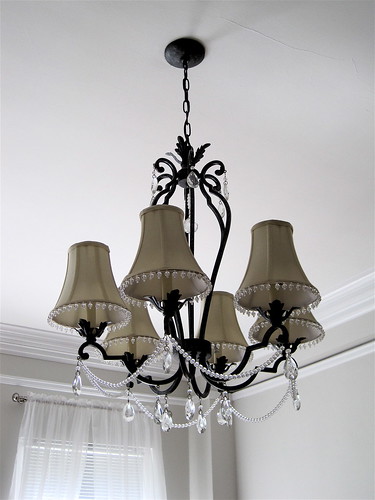
Because as much as I love downloading free public domain content, ever since I moved into a Grown Up Boston Apartment with, like, an actual paint job and nice chandeliers, I've been paying attention to my stuff. And thinking, "Ok, what will I want to keep around for a long time?"


Sadly, the chandelier comes with a rental, so it's not forever. Good thing I can always count on the Marches.

Er, Maahches.

April 11, 2011

Square. In a square. In a square.


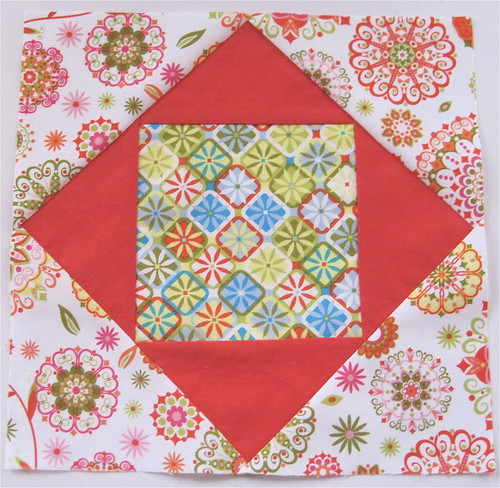
This month for the bee there or bee squares quilting bee, Sandie requested square-in-a-square blocks made using her tutorial.

Square-in-a-square is a block I really love. Other than the fact that I think it should really be called "square-in-triangles," that is, but nobody asked me. It's super easy and I think it looks very sharp. Sandie's tutorial uses a 5" charm square for the center, so it's a great way to show off some designer fabrics, or even some embroidery. I think it would also be a gorgeous setting for a scrappy log cabin block.

But I think everything should involve small log cabin blocks, so don't mind me.

April 8, 2011

Better than it sounds: Onion Day!

You know what I like? Red onions. They not only have a nice, mild flavor, but something about the color strikes me as sort of sweet and vintage-looking.

Which is one of the reasons I was attracted to the idea of making zesty onion jelly, which I saw in the Ball Book, but is also featured here, with a brilliant tip for getting that gorgeous pink color.

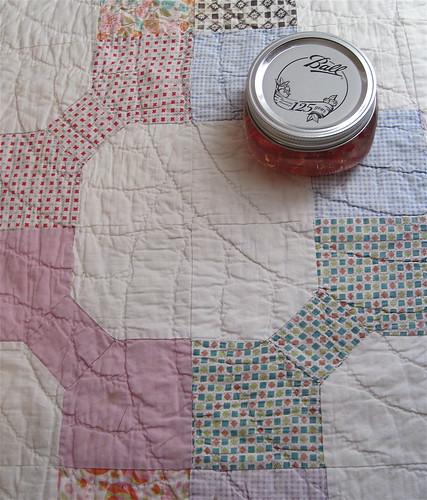
So I bought a big red onion, and went to town. Mine is considerably more clear than Michelle's, but that's okay. It still looks cute and old-fashioned atop my vintage bow tie quilt.


The craziest part? Three jars of jelly only required, like, half of the onion. Red onions are BIG! So I put some of the leftover diced onion into a pasta salad of slightly oiled leftover acine de pepe, pickled asparagus, minced garlic, and roasted red peppers. I'll be serving it with greens alongside roast chicken tonight. Store-roast chicken. Because not every day can be onion day.

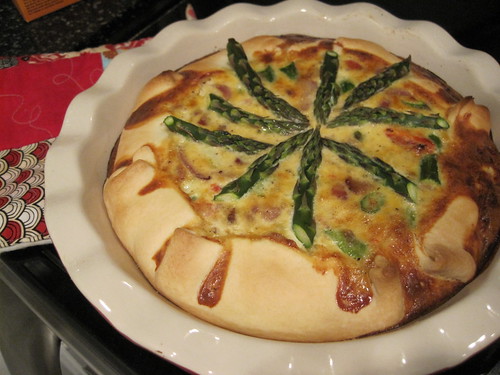
The rest of the onion got caramelized and went into a quiche of three eggs, cheddar cheese, crumbled bacon, fresh asparagus, more roasted red peppers, and a couple of teaspoons of grainy French Dijon. To me, it's just not quiche without a little Dijon.

Here's some advice on asparagus tips: do something dorky with them.


I mean, it's a vegetable. You kind of have to make your own fun.

Oh, and check it out - I'm updating my quilt progress bar:

Quilt: Hex Flowers
Progress: 44/100 blocks (44%)

April 3, 2011

Sufficient Postage

Quilt: Kaffe Postage Stamps
Progress: 20/??? blocks

Ever try an "ends and beginnings project"? A stack of easy piecing near your machine so that all sewing can chain piecing?

Well, I started something like this two springs ago with a couple of Kaffe Fasset charm packs - I wanted little bursts of bright color, and Kaffe is always a good candidate for that.

Today I ran out of pieces to chain. So as of today, I have 20 "postage stamp" blocks that look like this:


Now what?

March 28, 2011

Figgy Pudding

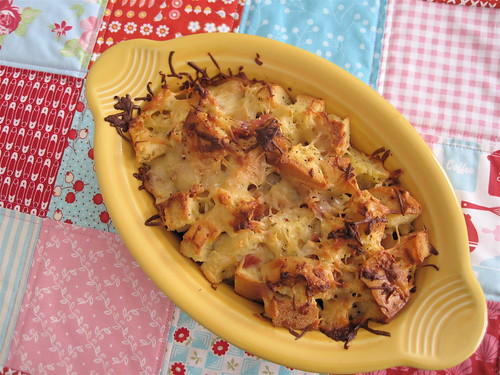
Last Sunday, eight days ago, I made a savory bread pudding according to the method described on Shallots Web.

bread pudding

I haven't made a second, which, if you can't tell from the photo, has required remarkable restraint on my part.

Spoiler alert: this savory dish contains no figs. I've named this post after a dear friend and the author of Shallots Web, Mr. John Newton, whose last name invites a certain fruity nickname that has been expanded over the years to include such names as Fignatious, Mr. Figglesworth, and my own twee contribution, Figgy Pudding. We met in grad school, so my love for him hinges not at all on the fact that he's an excellent cook and bartender.

Seriously, I know the coolest people. If you'll forgive a cliche, try this pudding - the proof, it is there. (And if you won't forgive a cliche, it's your loss if you discount the pudding.)

At the time of baking, I didn't have a ton of leftover veggies or anything, but attempted the dish anyway, with some not-so-healthy additions, because it looked and sounded so frakkin' delicious. For the bread, I used half a day-old French baguette, which I tossed in a mixture of
  • 2 eggs
  • maybe 2-3 tablespoons of milk
  • half an onion, diced and caramelized the day before
  • maybe 1/4 cup shredded cheddar cheese
  • 2 slices of bacon, microwaved and diced
    Then I shredded a small chunk of gouda over the whole thing and baked it for 35 minutes. In a gratin dish, because I like to be fancy. Prep time amounted to, I don't know. Like, a second. This is really easy.

    The results were a lot drier than your typical dessert bread pudding, largely because I feared too moist a mixture would take too long to bake - we were anxious to get to Southie and scout out a good spot for the St. Patrick's Day Parade. And, of course, being savory, there was no sugary, buttery sauce poured over it all. Still, I really loved eating this. The bread cubes were softened on the inside but golden brown and chewy outside, and the cheese and bacon clinging to each bite certainly didn't hurt anything.

    I'm already fantasizing about changing this up a bit for different occasions. It would be a wonderful way to use up leftovers of my famous ham. And speaking of ham, I think bits of prosciutto, chopped apple, and dried cranberries would be a delicious stuffing alternative alongside poultry. As far as cheese replacements, I have some crumbled bleu I'm going to have to use up soon, and I think I've just decided its fate.

    If you try this, let me (and Fig!) know. And tell your friends - we can all work together to make Savory Bread Pudding the new cool brunch/side dish.