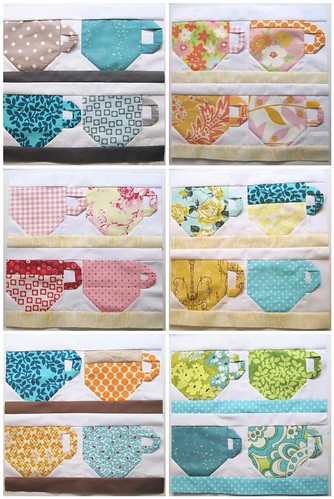
Once again for the [3x6] Sampler Quilt Mini Bee, I decided to modify some ideas into a block of my own design.
The advantage here is that I don't have to worry about making the same blocks as anyone else. The disadvantage is that, when someone compliments the block, I can't just toss them a link to some tutorial. Until I write said tutorial myself, that is.
So here's an attempt to help you make your own 12" teacup block.
A couple of notes:
- I didn't take pictures of every single step. So sorry! Rest assured, this is a simple block.
- Some tea cups will "change color" throughout the post. This is the unfortunate result of me being a tad late with my blocks this round, and having to snap pics during a furious assembly line process.
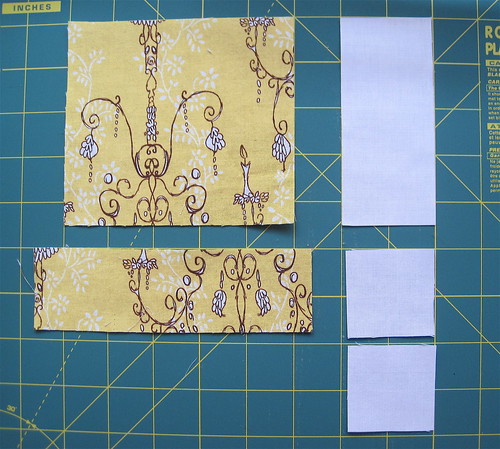
For your tea cup and handle, you'll need:
- 1 print rectangle, 4.5" x 5"
- 1 print rectangle, between 1.25" and 2" wide, at least 4" long
- 1 white (or background) rectangle, 2" x 4.5"
- 2 white (or background) squares, 1 7/8"
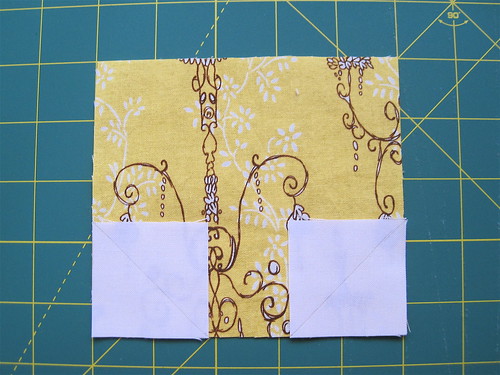
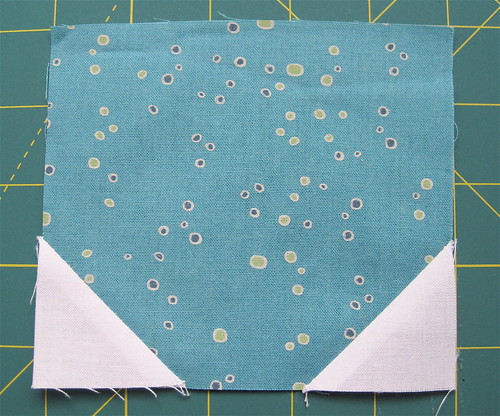
Use a pencil or water-soluble pen, draw a line from corner to corner across each 1 7/8" square. Place the squares on the bottom corners of the 1 print rectangle, 4.5" x 5", as shown, making sure edges are aligned. Pin if desired. Sew carefully along the pencil lines.

Using a ruler, trim off both corners .25" from the seams. Fold down the white fabric and press. You have just created the curved bottom of a tea cup! See?
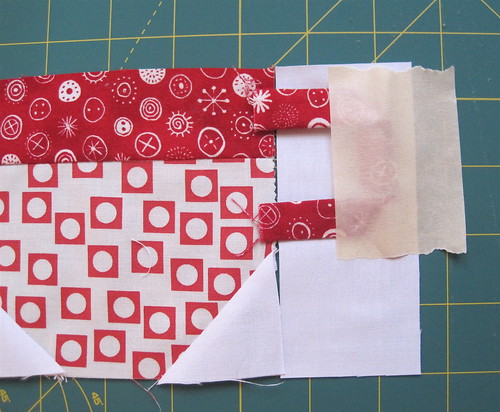
Take the remaining print rectangle and fold it longways with the right sides together. Sew .25" from the raw edge to make a tube:
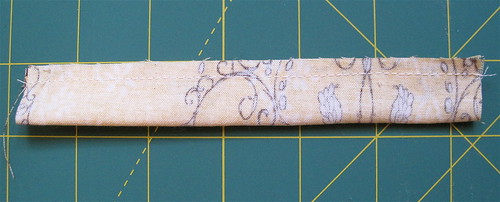
I like to make the tubes varying widths.
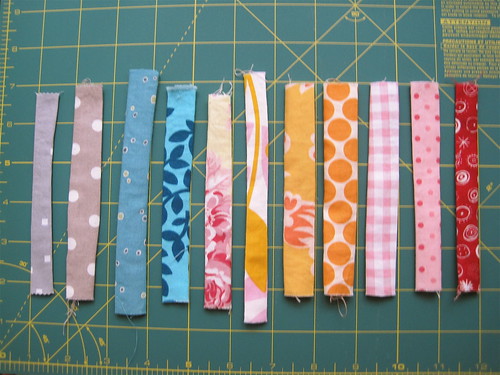
Mostly because it's easier that way. Use a turning tool to turn the handle so the right sides are facing out, and press to get nice, crisp edges.
To attach the handle to the rest of the cup, line up the 2" x 4.5" rectangle to the right of the pieced cup unit.
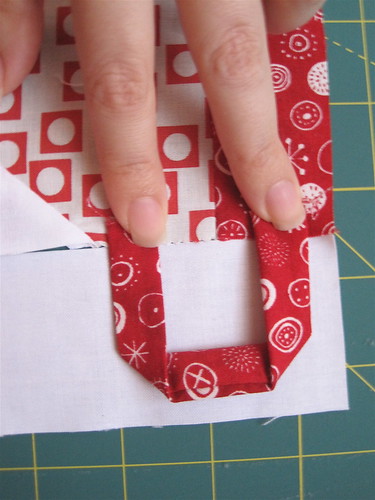
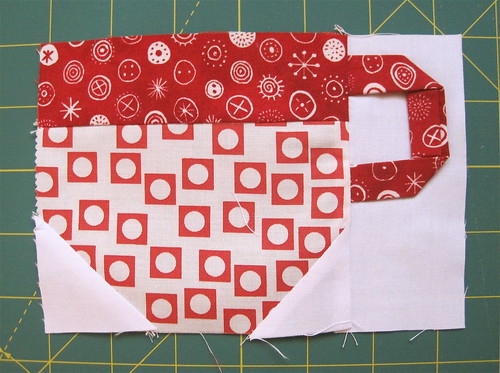
Fold the handle piece into a "u" shape until it resembles a cup handle of your liking. Pardon my (lack of) manicure.
Pinning would be fiddly at this point, so I just stick the handle to the background rectangle with a bit of masking tape. As long as you keep the tape out of the seam allowance, it won't interfere with sewing.
You can see how I kept excess handle fabric to the left of the background rectangle, where it will get caught in the seam and can be trimmed later.
Sew, trim, and press, and TA-DA!
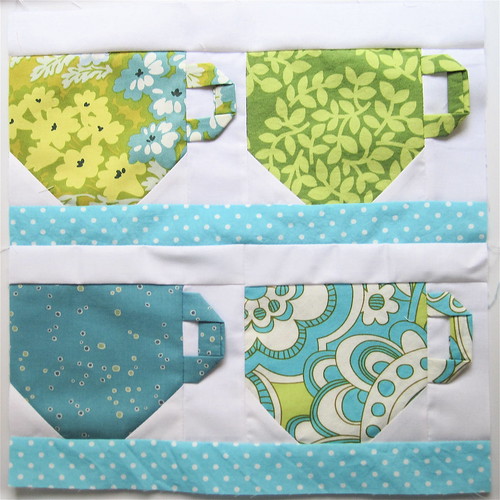
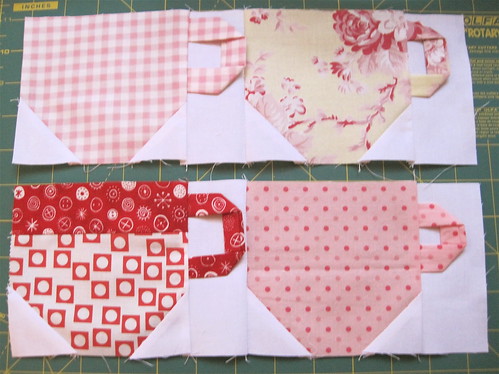
To turn four 4" x 6" teacup units into a 12"-block, arrange them into two rows and attach them like so:
To EACH of these units, sew one white (or chosen background fabric) strip of fabric 1.5" x 12.5" to the top of the unit, and a strip of the same size in your chosen shelf fabric to the bottom of the unit.
Then, stack the units and sew them so they look like this:
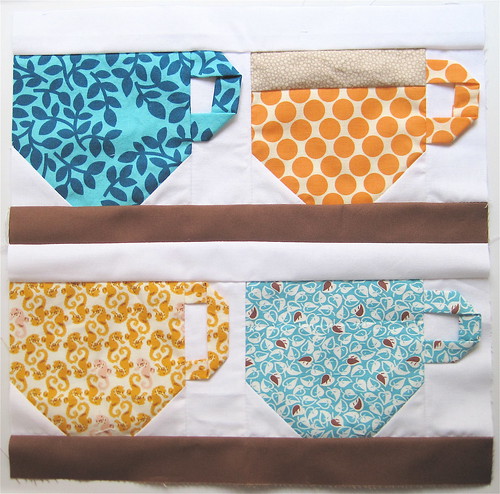
Of course, you can make a 6"-block by adding 1.5" x 6.5" strips to the top and bottom of one cup unit, but I was aiming for a 12"-block, and the appearance that the cups were together in a cabinet or on shelves together.
Handles can be appliqued down, tacked down, quilted down, or left to flap freely in the wind!
Please leave a comment with any questions or concerns!